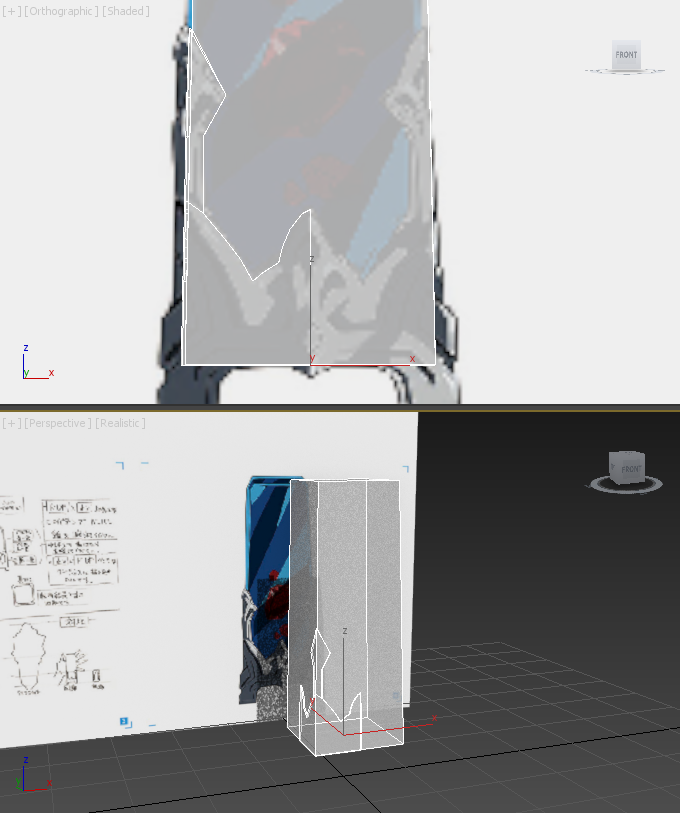
Modelling - Day 1As I started this model, I realised that I only had to create the design on one quarter of it, then I would just use the 'Symmetry' modifier to to mirror this around for all the other sides. This would involve me mirroring it once to the opposite side, then once again to mirror the whole front to the whole back.
First of all, I started with a new cube then selected it's top face and scaled the cube so that it was narrower towards the top. This was to reflect the shape of the template, where the crystal got narrower towards the top. On this first day I only really had time to carve out the first shape, that being the corner arms that went up the crystal to hold it, and the basic outline of the base part. |
Modelling - Day 2
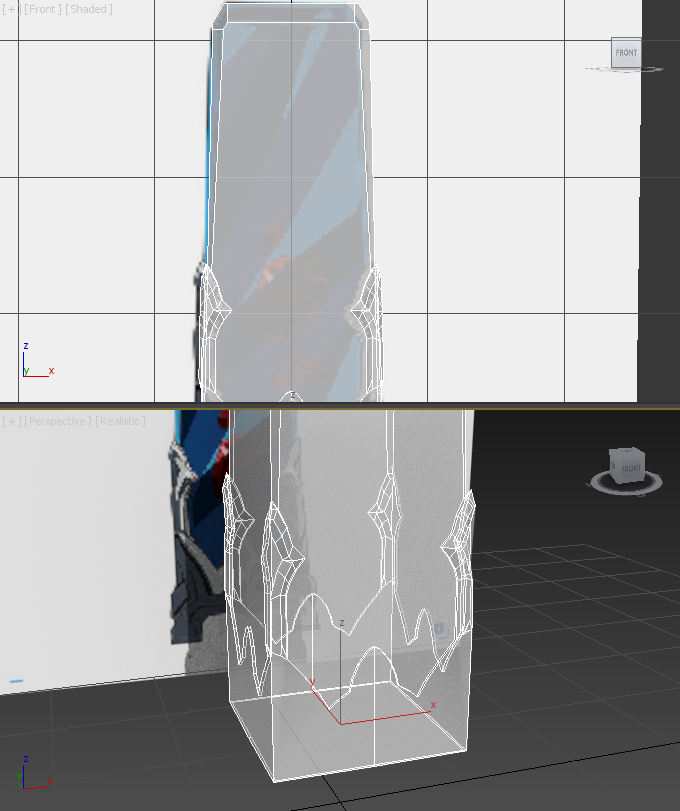
On day 2, I started to figure out how to create the extruding circular shapes. I started by using the 'Cut' tool to create the outline which became the centre of the raised part, then used the 'Inset' tool to create another layer of lines inside of the previously cut ones, that matched them in shape. I grabbed the middle vertices and used the movement mouse mode to bring these outwards. As everything I did had to be the same on the adjacent corner, I used the accurate x, y, & z position values found at the bottom toolbar in 3DS Max when the movement mode is selected. I simply copied the value of the y and pasted it onto the value of the x on the adjacent corner, as well as copying the z (height) from the one to the other z value. The x and y values where reversed as the cube is a perfect square width/depth-wise.
The next thing I wanted to do was select all the edges of the crystal on the top and sides, and apply a chamfer using the 'Chamfer' tool. To get the top corners smooth like that I also had to use the 'Chamfer' tool on the individual vertices that were the top corners.
After finishing these extended side-arms and the top chamfering job, I had to wrap up the work of this model at that point due to time-restraints of getting the other models finished as well on-time. I thought I'd leave this model as the level of detail could change depending on how much time I have left when I come back to this. Henceforth, I went and produced my 5th and 6th models before returning to making this model on day 3.
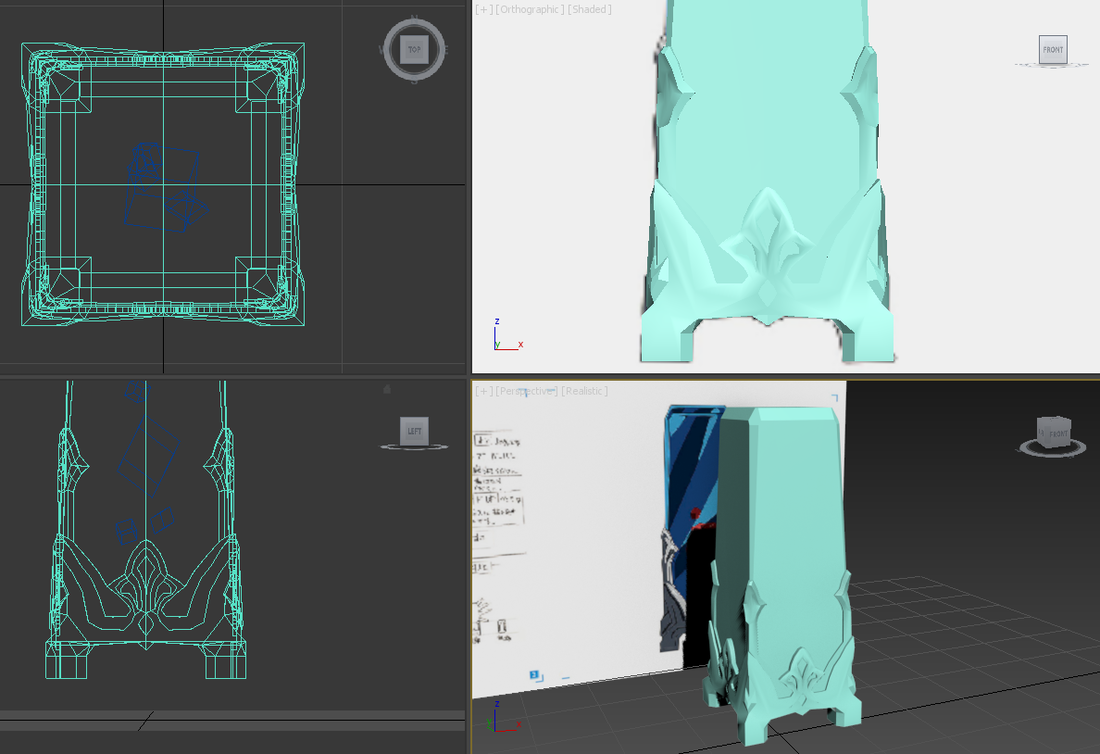
Modelling & texturing - Day 3Come day three, I still needed to add the multiple layers, the centre design, and the legs. I started off by squaring out the sides of the base part (so that they were all flat vertically). This just made things a whole lot easier when extruding multiple faces at once and trying to copy and paste position values between vertices on adjacent sides. I used the 'Cut' tool to trace out a simple shape of where the first layer would extrude from the base, leaving behind the upper, inner-most layer (if looking from the front) as well as the inner parts of the centre design and the base layer of the corner holes. I then added further lines that made up those other shapes, building up the design on that layer I had just extruded.
After that I used the 'Cut' tool once again to create the base face of which the legs would extrude from. I then used the 'Extrude' tool and created the legs, quickly followed by me using the 'Chamfer' tool on the lines that linked the legs to the base of the model. I then selected the produced vertices and started moving them around to create a smooth transition between the base and the legs.
|
I then worked on the corner holes, using the 'Cut' tool once again to add another layer to it, then extruding the upper base layer inwards. I then followed by extruding the new lower layer outwards, then used the scaling mouse mode to overlap a few of the vertices that I wanted to weld together to create a smooth curved effect. Of course I had to mirror all these effects to the adjacent corner for the future when I used the 'Symmetry' modifier to mirror the design around all the corners, which took up a lot of time. I had to click on every individual vertex to get their position values, then click on the mirrored vertex on the adjacent side and paste the values that needed to be symmetrically the same. I'm sure there's a faster way to do this, but I tried using the 'Mirror' modifier before, but a whole lot of extra unwanted faces and vertices were created.
One final thing I had to do to the base design was make the main raised layer curved, so I used the 'Cut' tool to draw a line in the middle of the previously existing lines. After mirroring this to the adjacent side, I then used the movement mode to bring these vertices outwards, creating the bump.
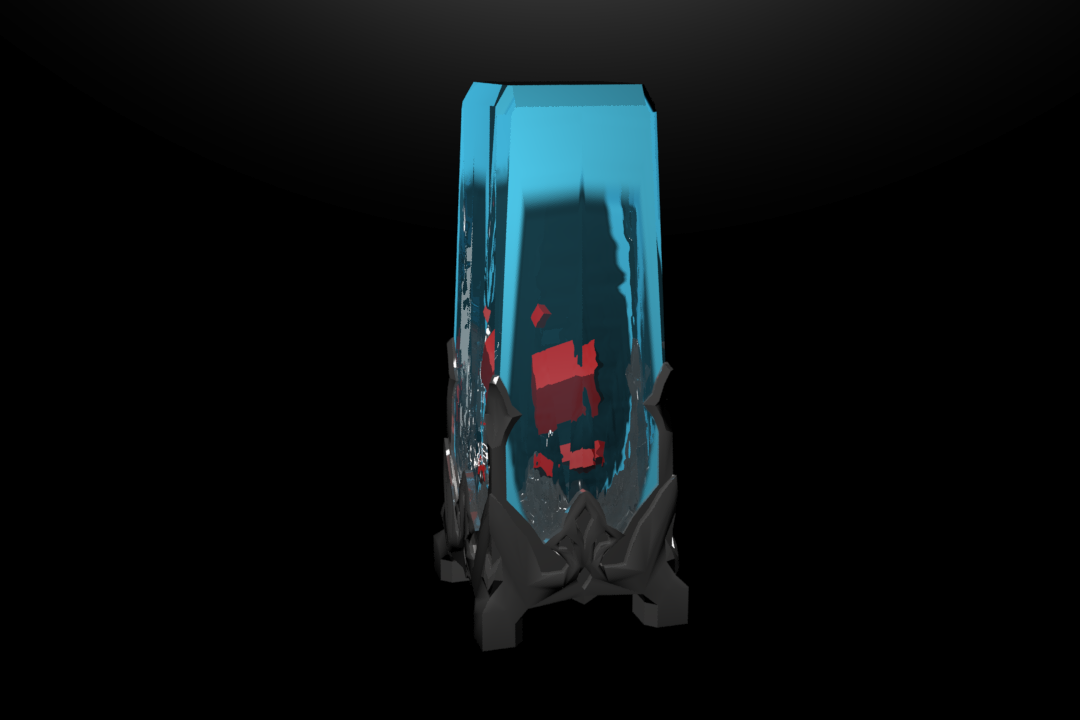
I quickly set the texture ID of the crystal part on top to ID 1 and the rest to ID 2, then used the Polished Steel on the ID 2 parts (the base section). I then used a Glass Block texture and changed the tint of the glass before applying this on the the faces that was ID 1. The last thing I had to do was add the crystals inside. As the crystal's designs are very much 2D and very complex I opted for an alternative. I added cubes, coloured them red, and stretched, rotated and moved them about until they matched the basic shapes of the original design. I think the outcome look of them through the Glass Black texture looks really cool.
Final Image, 3D Viewer & Thoughts
One thing I would have liked to do would be to smooth out the curvature of the raised 'bump' sections on the base design, and maybe look for a better metal texture.
Other than that, I'm really happy with how the whole Corridor Crystal model came out, especially the crystal itself with the red cubes inside it.
Other than that, I'm really happy with how the whole Corridor Crystal model came out, especially the crystal itself with the red cubes inside it.


