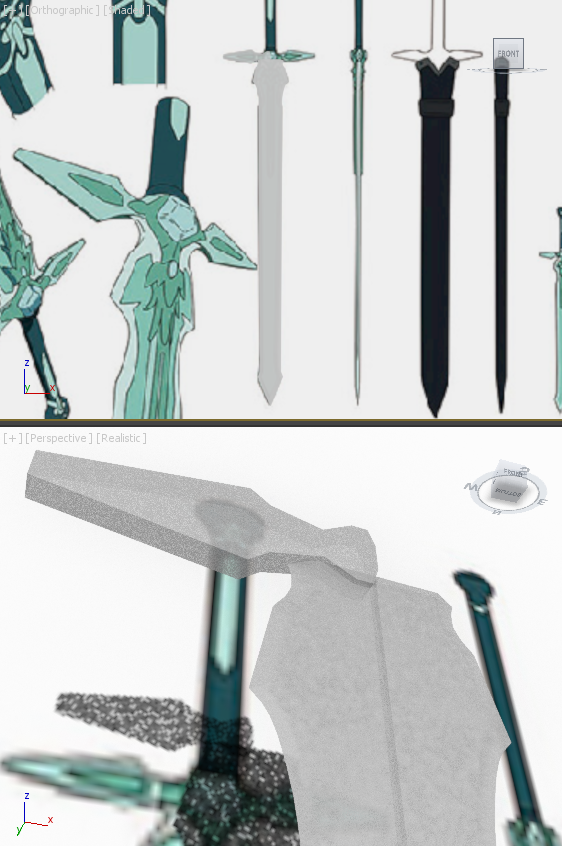
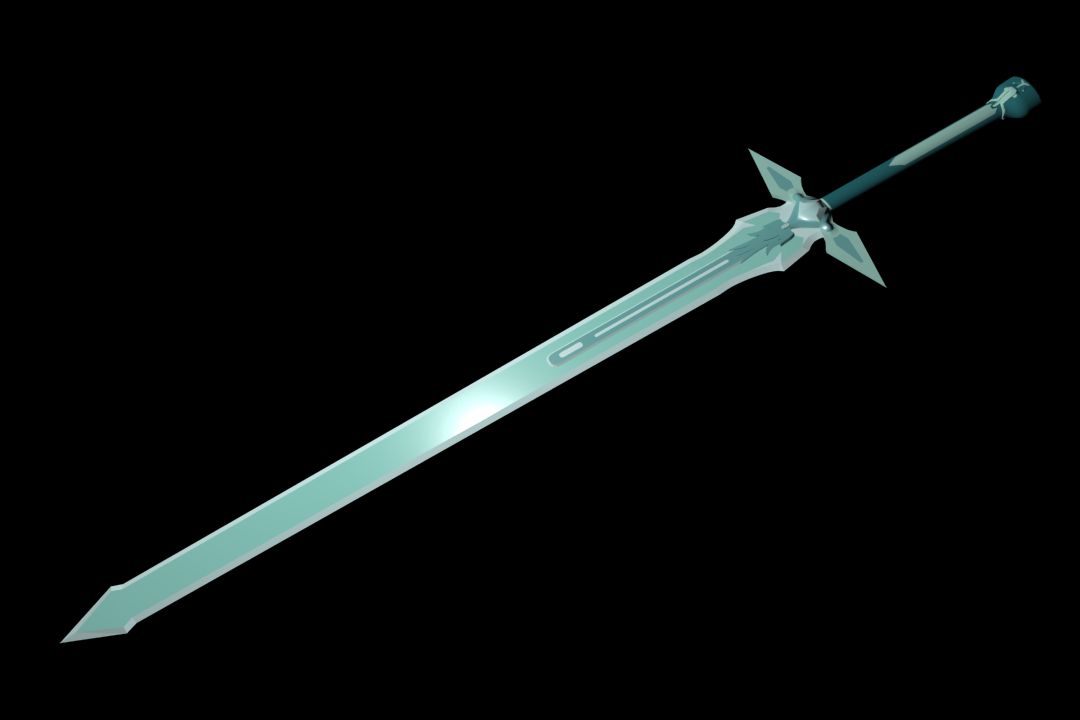
Modelling - Day 1So just like my Elucidator, this sword has two parts to it, the blade itself and the guard/hilt, where the blade is thinner and fits inside the guard. As so, I started with two basic shapes and modelled the outline of the blade and one of the sides of the guard.
When I finished modelling the blade, I used the 'Inset' tool to create an inner ring of vertices along the edge of the blade, then scale the outer vertices together so that I could weld them into a sharp edge. Looking at the design in the top image, you can see that the inner blue texture doesn't quite follow perfectly a simple inset of the same shape as the edge. This meant I had to create additional vertices on the blade's full, move these around and connect a bunch of these together to create the inwards spike effect, the smoothing of the edge, and the how the top folds inwards, instead of following the edge to the very top. |
Modelling - Day 2
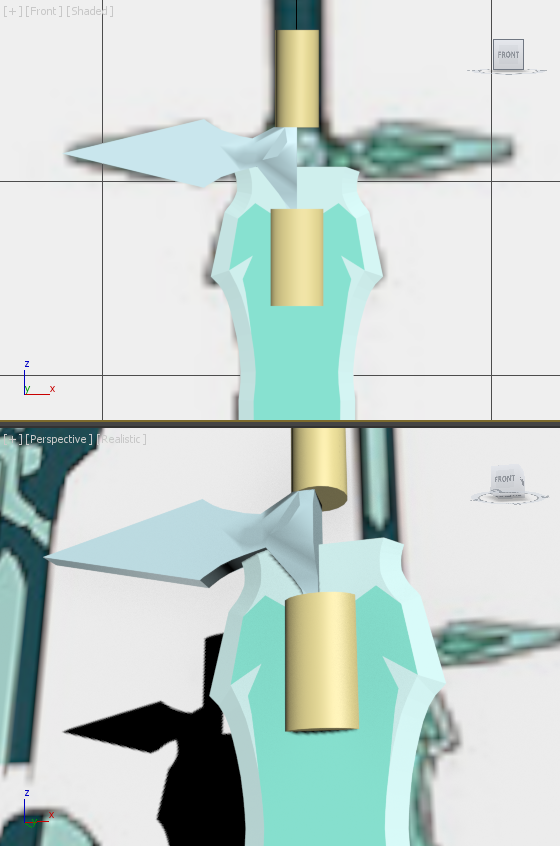
On the second day, I continued to work on the guard. This involved me making the pointy edge into a spike by welding the vertical vertices together and adding more vertices for the centre crystal piece & surrounding raised area. After that, I moved these vertices instead of extruding them as to get a curved surface as they rise. I then used the 'Inset' tool for the crystal's inner tallest elevated part, and added more vertices on the extending side spike for the inner to-be textured area.
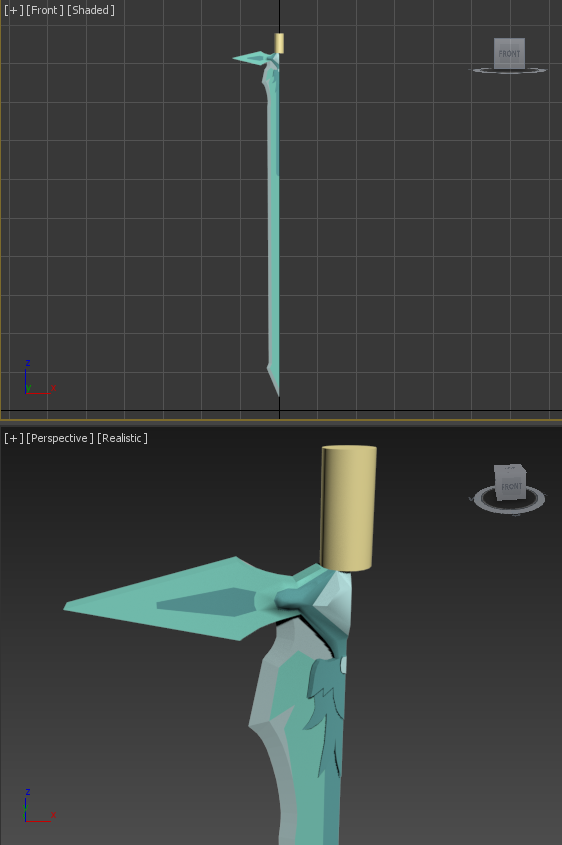
After I was finished with the guard, I moved onto figuring out how to incorporate the hilt and the rain-guard. As I created and placed the basic cylinder shapes for it, I realised I'll have to texture the blade in order to get the ratio perfectly accurate. To do this I went around selecting all the outer edges of the blade and set their texture ID as 1, then for the full of the blade I set their IDs to 2. I left out texturing the guard for now as I only needed that shape to figure out where it connects to the rain-guard.
After I was finished with the guard, I moved onto figuring out how to incorporate the hilt and the rain-guard. As I created and placed the basic cylinder shapes for it, I realised I'll have to texture the blade in order to get the ratio perfectly accurate. To do this I went around selecting all the outer edges of the blade and set their texture ID as 1, then for the full of the blade I set their IDs to 2. I left out texturing the guard for now as I only needed that shape to figure out where it connects to the rain-guard.
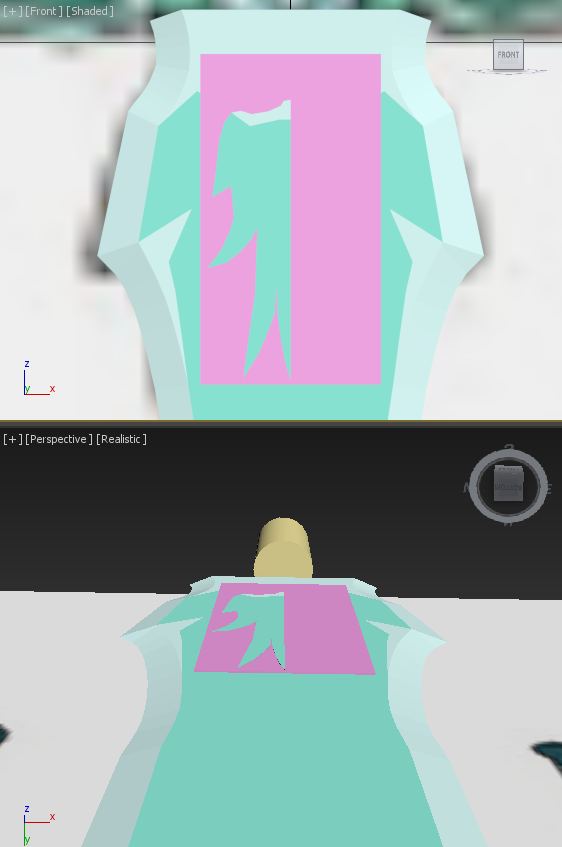
Modelling - Day 3Creating the basic shape of this actually took up all the time I had to spend on the modelling this day. You can't see it, but I also modelled the lining for the inner spiky parts as well.
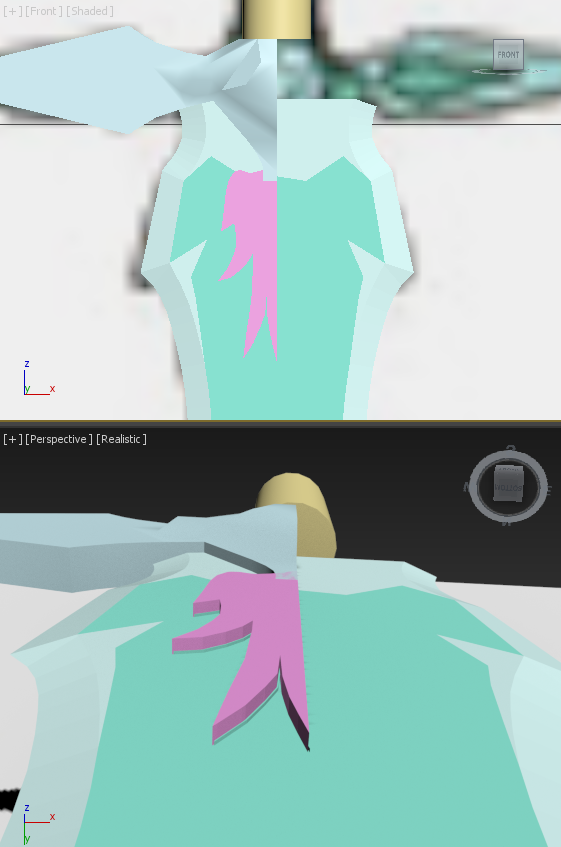
First of all I modelled this onto the blade's surface, thinking I can then just curve this after, then I realised I could use a 'Bend' modifier if I made this part a separate object. This is the purple plate you can see here. All I had time for was getting it in place and adding vertical lines as to how the object would bent. Modelling - Day 4On day 4 I also had little time, but managed to re-create all the vertices I had previously made on the blade, but this time on the new slate object. This took a lot of time as I had to remap each and every vertex, copying and pasting their x and z co-ordinates, whilst also fitting them around the pre-existing vertical lines which are required for the 'Bend' modifier to do it's magic.
This whole copying and pasting process took much longer than it needed to and I'd do well not to forget about this in future as to not waste time in a similar manner ever again. |
Modelling & Texturing - Day 5
Now that I had my base shape, all I had to do was extrude the multiple layers and add the 'Bend' modifier. This took a bit of tinkering around, but eventually I got a happy height and curve that I liked. This did require me to change the height of the guard that connects to the rain-guard a bit, but it all worked out in the end.
One thing this did do was identify where I could improve the curve of the ridge around the crystal. I added extra lines, and manually placed them to create a smooth curve. This also eliminated some strange lighting that was happening on the curves before I added the extra lines to smooth them out.
After completely finishing the rain-guard's large spiky section, I start to texture it and the guard. for the darker blue areas, I set their face's IDs to 3, then set the crystal parts to ID 5. For the remaining parts, I set the texture ID to 4 and set the colour to a slightly sharper green. The last thing to do was add the long extension of the rain-guard that runs down the full of the blade.
Modelling - Day 6As previously mentioned, just before I started work on the hilt and pommel, I finished off the extension of the rain-guard that runs down the full of the blade. All I did was correct the width of it, then add a couple indented parts on the inside, that I set their texture IDs as 1, to match the same colour as the blade's edge. For the bulk of it, I set it's ID to 3 to that it matched the rain-guard's colour.
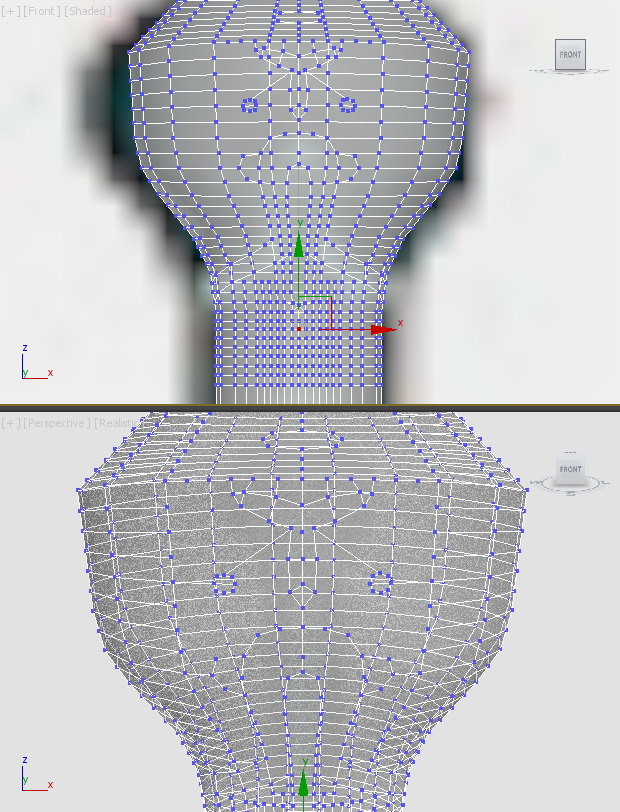
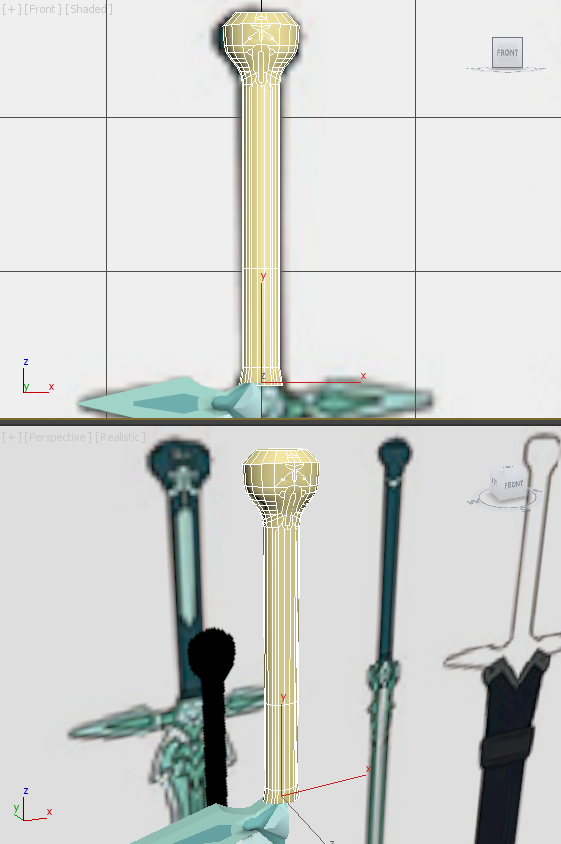
As for the hilt, it had a very basic shape design with the pommel simply curving outwards then rounding off at the top, but the complex part was the detailed textures. To accomplish such details, I started out by using the 'Connect' tool to break down the surface so that I had enough points to work with. On the left you can see when I was half way done, that being the top half, where the bottom half still has its grid of vertices all ready. I clicked on each vertex and used the scaling and movement tools to re-position them to my hearts content until I was happy with the result. As one part of the design has lines that go in-between the same coloured section, I thought extruding this section would work instead, creating the break between the surface even though they are the same colour. I used the 'Extrusion' tool and selected the faces I wanted, although as this included parts that wrapped around the sides of the pommel, there were some deformities. This forced me to do this in three parts, one for the front, and one for each side. After I did this, I joint the extruded vertices that bordered each other together, to create a single extruded section. |
Modelling & Texturing - Day 7The last modelling step I had to do was just apply a 'Bend' modifier to the spikes on the guard and round the point closer and closer together.
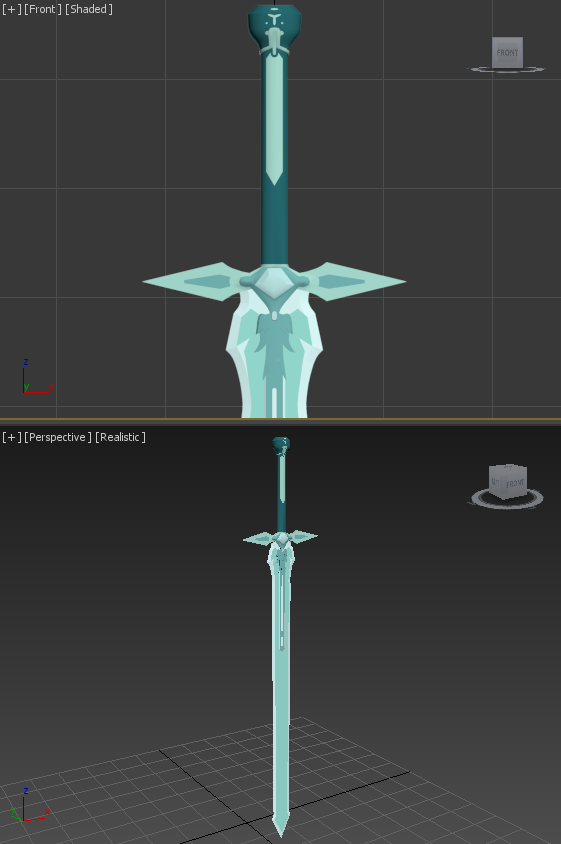
At this point, every part has been modelled. All I had to do was finish the texturing and mirror the design around. For the hilt, I set the texture IDs of the detail parts to 4, just like on the guard, then the main darker texture to ID 6. Now that I was done texturing, all I had to do was mirror the parts around and join them all together. Recently I found out about the 'Symmetry' modifier and I prefer to use this instead of the 'Mirror' modifier now. If there is a slight gap between the mirror plane and the edge of the object, then you can just pull out the face across the mirror plane to fix this. In the final result you get a new poly where the overlapping mesh that crosses the mirror plane is fused together to make a hollow inside. If I used a mirror there is a chance that the inside will still have the side on the original shape in it. So for my model, I first had to use the 'Symmetry' modifier to mirror the one side to the other. After this I then also needed to mirror the front to the back so that I had the design on both sides of the model. |
Final Image, 3D Viewer & Thoughts
This time around, unlike the Elucidator, there were many more curving parts, meaning I had to use new techniques I hadn't done before, like using the 'Bend tool'. I especially enjoyed the detailing on the pommel and making sure all the little details were perfect in comparison with the original artwork.
One thing I would want to change, it the very base of the blade. I think it's just a little bit too thick in my opinion, but when I asked peers, they said it looked fine. Anyways, I'm really happy with the finalised quality of this model.
One thing I would want to change, it the very base of the blade. I think it's just a little bit too thick in my opinion, but when I asked peers, they said it looked fine. Anyways, I'm really happy with the finalised quality of this model.

