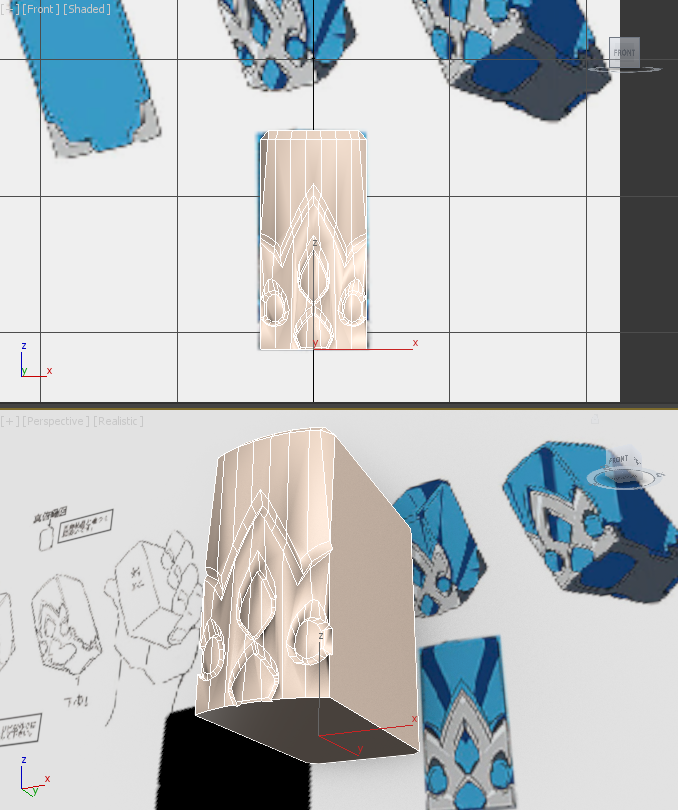
Modelling - Day 1On the 1st day, I started with having to Photoshop the source image as none of the templates had the crystal looking straight-on. If you look at the template in the image I'm sure you can see how I did it. I copied the design of the far right image, flattened it out, then mirrored it across to make sure it was symmetrical. After doing this, I started modelling.
I began with a simple cube, just roughly guessing how deep it was going to be, which I ultimately changed later on. I first used the 'Chamfer' tool to round the top edges, then proceeded to use the 'Cut' tool to start designing the front design. The silver metallic parts weren't extrusions, but actually insets on the crystal, so I had to create valleys between the crystal and the metal part. This meant I could use a mixture of free drawing (using the 'Cut' tool) and the 'Inset' tool to get the job done. I only had enough time on the first day to complete the front, as getting all the placements of the vertices took some time. I also used the 'Chamfer' tool on the side edges and to create the valleys. I just selected the vertices and moved them inwards using the movement mouse mode, just like how I ended up creating the bumps on the Corridor Crystal model. Modelling & texturing - Day 2So as day 2 came to an end, I wrapped up the model completely. Here's all I had to do. First I used the 'Cut' tool and created the square edges on the sides and the bottom. To make sure everything was aligned I used the precise position values found at the bottom of 3DS Max when the movement mouse mode was selected. Just like how I created the valleys on the front, I used the 'Inset' tool to layer up the lines, and the 'Cut' tool to fix a few issues. These issues for example involved the inset going all the way up to the top of the side face, whereas I only wanted the inset to run along the bottom. I used the Cut tool to add ending edges on the bottom, connecting them to the side edges, then removed all the unwanted edges from the top and sides of the side face.
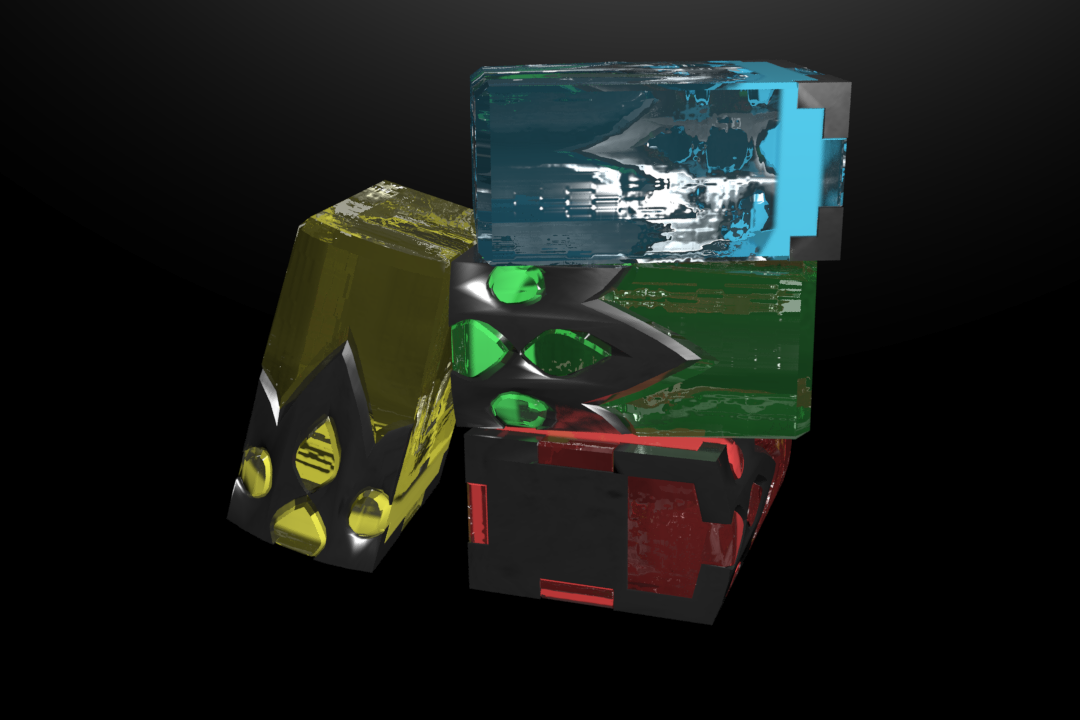
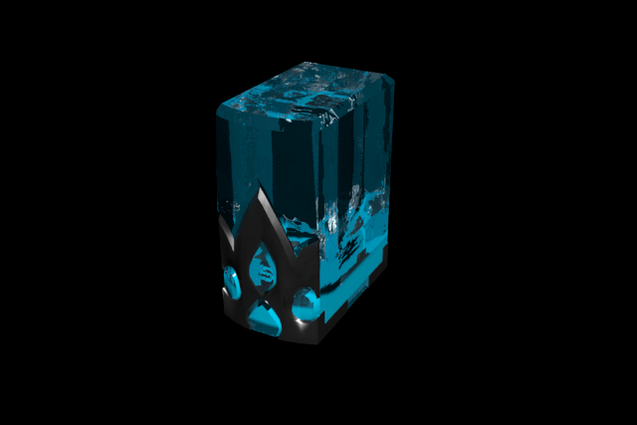
After completing this all I had to do was texture the model. As this model was quite simple I thought it would be a great idea to duplicate the model multiple times, and just change the colour of the crystals. This matches the source crystals in Sword Art Online, and how each one did different things, like heal (red), teleport (blue), remove certain debuffs (green) and boost a skill (yellow). I first had to texture the first model before I duplicated it. I setup the texture IDs of the model really fast as there was only 2 textures I wanted to use. One for the crystal, and one for the metallic part. I applied the Glass Block to ID 1, as this was the crystal part, and Galvanized Steel ID 2. I then duplicated this model 3 more times, resulting in 4 models, then changed the source material independently for each crystal, changing the tint of the glass for each. |
|


Final Images, 3D Viewer & Thoughts
I really like the look of the glass in this model and it was great to work with multiple of them and to pose them in a scene as shown with all the different vibrant colours. There's nothing I would like to change about this model, as it was such a simple design and I think I nailed it.
|
|
|