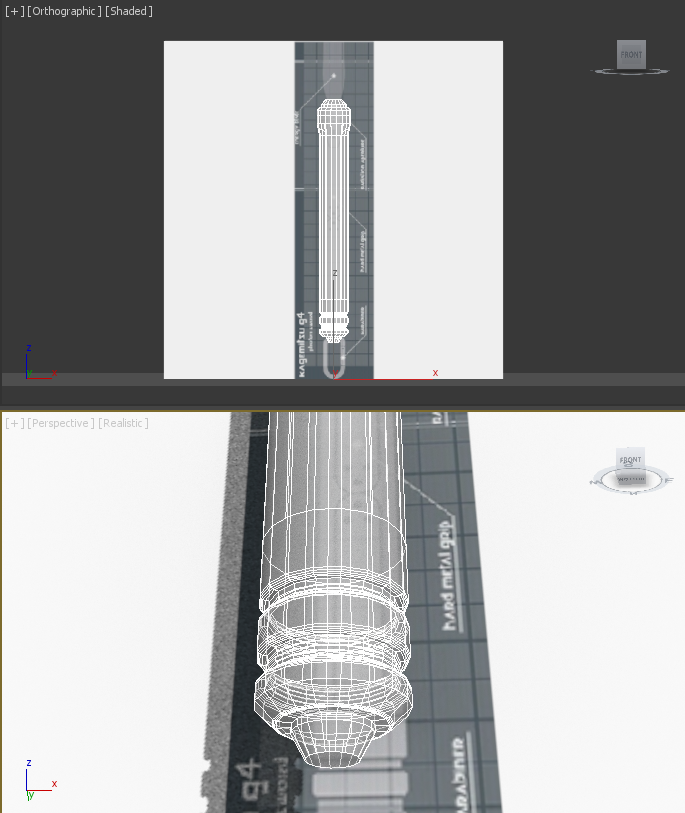
Modelling - Day 1Going into this model, I thought that it wouldn't be too difficult, though it soon got more and more complex as I went on. Here in day 1, things where still quite simple. I got my template setup on a frozen plane, that can't be interacted with, and started with a tall cylinder.
I used the 'Connect' tool to break up the centre of the cylinder more, allowing me to place where indents were to be. At the very bottom I simply used the scaling tool to shrink the size of the circular rings I made earlier with the 'Connect' tool to create the cone effect. If you look at the bottom-most cone, it is placed on a flat surface, which I created by using the 'Extrude' tool on this section of vertices. This created and new horizontal surface between the edge of the lowermost cone and the coned lip above that. As for the 2 other indented sections I also used the 'Extrude' tool to create them. I then went around the outer edges and applied a smooth curved edge using the 'Chamfer' tool. Within this tool, I used options that change how curved you want the shape to be, and how many lines it will use to create the curve. I only wanted enough lines as to make the curve look smooth and not any more as any further will be pointless as you can't visually see the difference unless you were really really zoomed in. I started the top basic shape, using the came 'Extrude' technique as I used for the bottom cones, but had to end it there for day 1. |
|

|
Modelling - Day 2I started day 2 by using the 'Cut' tool to create the extra vertices I needed to create the funnelled front plate. I then went on to use the 'Cut' tool to add the circular centre pieces of the middle of the handle/grip area. After that, I used the 'Extrude' tool once again to create an inset grip area, as well as some extra insets in the middle of the top part of the Photon Sword.
As I reached this stage, I realised that adding the switch part that branched off the top ring and went down over the rest of the top part of the Photon Sword was going to be tricky. I could have created a separate model and then attached it onto the main model using the 'Attach' tool, but I ended up find a work around that did the trick. I started by extruding from the bottom of the upper ring, then pulled the vertices down and back to make the part sink into the rest of the top part as well as add the angled bottom part of this switch section. I simply started using the 'Connect' tool to break up this section more and more until the switch, tracks and outer rim all came into shape. It was only later that I found there was a more annoying issue of making this switch section this way. |
Modelling & Texturing - Day 3First, before moving onto the switch design I had to use the 'Cut' tool to create the circle shapes on the centre of the grip, before extruding them inwards slightly. After I did this I used the 'Symmetry' modifier to mirror the front design to the back. I had to do this now before I added the switch, as the switch is only for the front. Starting where I left off, I used the 'Extrude' tool to sink the drawn out parts of the switch I had made the previous day only to instantly encounter an issue. As I simply pulled this part down from the top, the design of the circular part of the Photon Sword was still underneath, and if I wanted to sink the switch design downwards, I crossed into the still-present circular design underneath, which was no good. My work around for this was to add extra vertices just after the sides of the Photon Sword's circular outer shell went inside the edges of the switch section. I then grabbed all the vertices between each side (which would normally cross into the area of the switch) and pull them back, deeper into the Photon Sword's centre core. This then gave me the room to sink the parts I wanted of the switch section without any overlapping. The downside to this is that if you pop the camera inside the Photon Sword's body, you will see a small gap between the switch section and the vertices I pulled inwards. If I was to re-do this I'd have planned for the flat section to make the switch on-top of from the start, making sure the circular edge of the Photon Sword stopped at that point, leaving the flat area for me to later make my design on-top of.
The next part was the top of the Photon Sword where the photon blade would come out of. I thought this was going to be the easiest part, as I'd just be insetting and extruding inwards, but oh boy, was I wrong. It was the three claw pieces that made things difficult. As there's no way, that at least I know of, that locks vertices you create to a surface other than the basic x,y, or z axis, creating the claw designs took a while. First, I tried extruding them from the base cone, then I tried extruding the base cone inwards instead. Every time I tried, I just couldn't get the little flat horizontal part at the very top of the claw to exist. In the end I realised that there was also a dip just before the top part, which also made issues with the front part that links up to that. I had many issues of vertices not welding together and lines not connecting for one reason or another. In the end I just overlapped most of the vertices that didn't join and let them be, but in a way that it didn't create issues with the design. After some time, I eventually figured out a way to create the top-most claw part as well as to match this up with the base on which I wanted to start extruding inwards the design. Once all of that was done, I used the 'Extrude' tool along with the movement scaling modes to position the vertices as I saw fit. As I reached the centre, I then extruded upwards, then outwards, then inwards again before upwards once more, before scaling all the final points together to make a spike, which I welded together.
|
|
Moving onto texturing I actually didn't use any metal materials this time around. I just used standard materials, simply playing around with the colours. It took a while to select all the faces and then them hooked up with the right texture IDs for applying the textures, but after I finished the result was worth it.
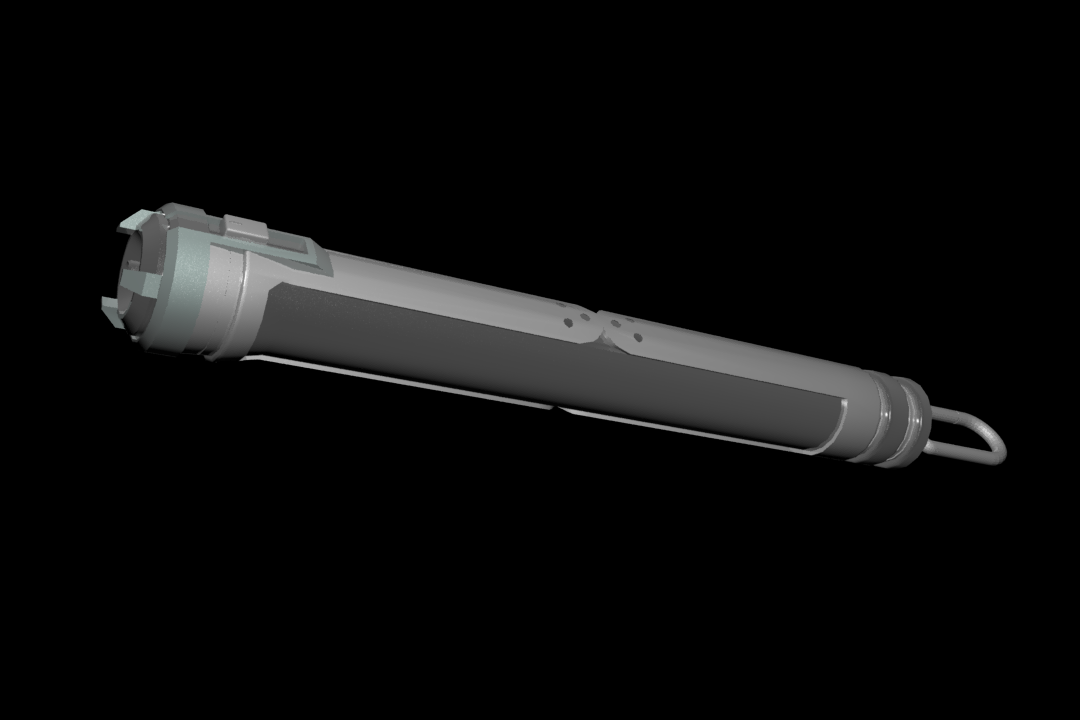
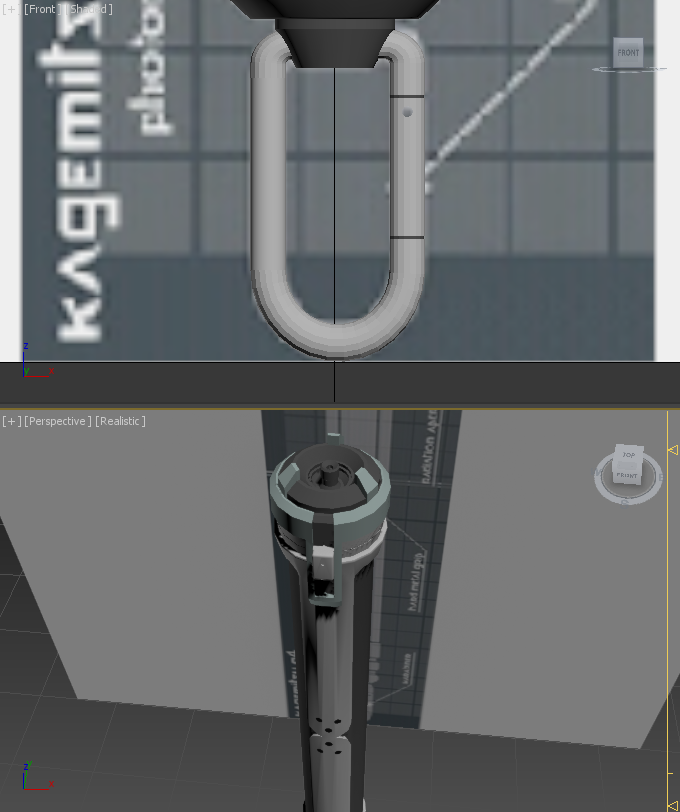
Going back to modelling, I just realised I still hadn't created the carabiner which was used for hooking the Photon Sword onto one's belt. To create this, I started with a simple cylinder. I extended this downwards then selected only the lines where I wanted the first bend (the bottom left) to start. I then applied a 'Bend' modifier to these lines and set the angle to 180 degrees. I instantly realised there was an issue as the shape didn't bend at all, it just did a direct diagonal to reach the end of the bend. I went back and used the 'Connect' tool to add more horizontal breaks, as to allow the shape to bend smoothly. After completing this for the bottom left corner curve, I extended the shape once again, but upwards this time before applying another 'Bend' modifier. This time the bend was set to 90 degrees, but the shape of the bend didn't quite match up. I had to use the movement and scaling modes to resize the bend as to make the bent cylinder actually fit the template that I still had behind. I then applied the same technique to the opposite side of the cylinder for the other 90 degree bend, completing the carabiner shape. I used the 'Connect' and 'Extrude' tools once again to make the little indents of where the latch would be, then created a new cylinder for making the hole in the carabiner. I positioned this cylinder so that it overlapped the carabiner where I wanted the hole, then set the carabiner as a compound object, subtracting the other cylinder from it to create the hole. Now I just needed to texture it up and use the 'Attach' tool to attach it to the main Photon Sword's body.
|
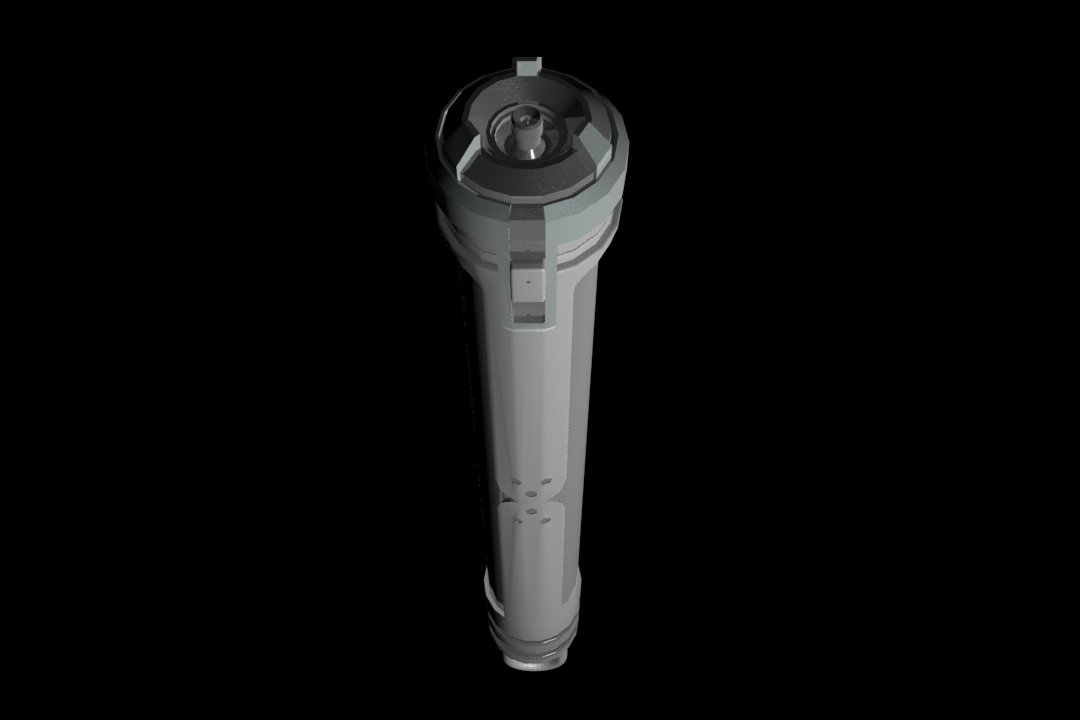
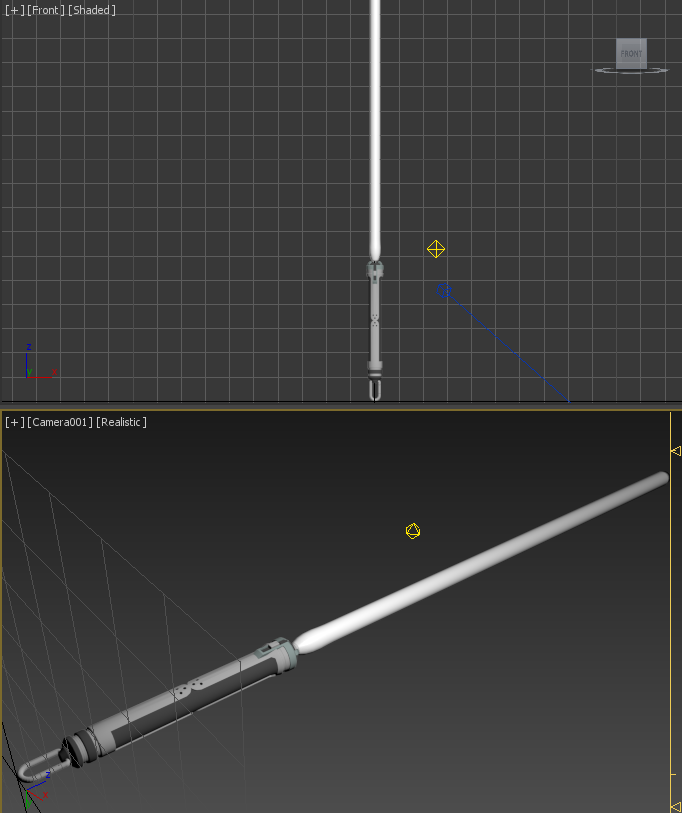
Modelling & Texturing - Day 4By day 4, I had completely finished the Kagemitsu's body. Now I just needed to add the photon blade. To do this I simply added a new cylinder, used the 'Connect' tool to break it up some, used the movement and scaling modes to add a point to the bottom, a small larger section at the base of the blade, and a rounded top.
Next, all I had to do was add the special effects. I used the 'Environment & Effects' panel to add a 'glow' 'lens effect' to the blade. After a while of tweaking the colours, the intensity, and the base colour of the blade, I was finally happy with the result. I kept the centre more white, but then had a more purple-pink glow emit from around the blade. Finally, that brings this model to an end. |
Final Images, 3D Viewer & Thoughts
|
As previously mentioned, if I did make this model again, I would have tried to figure out a better way of implementing the switch section, but other than that I'm really happy with what I created.
It turned out to be probably the most intricate model I made, due to the fact of the sheer number of different techniques I had to use when creating this model, though that just made it an even better experience. I learnt a lot of new techniques that I carried through to my other models from here that I'm sure you'll recognise. |

|