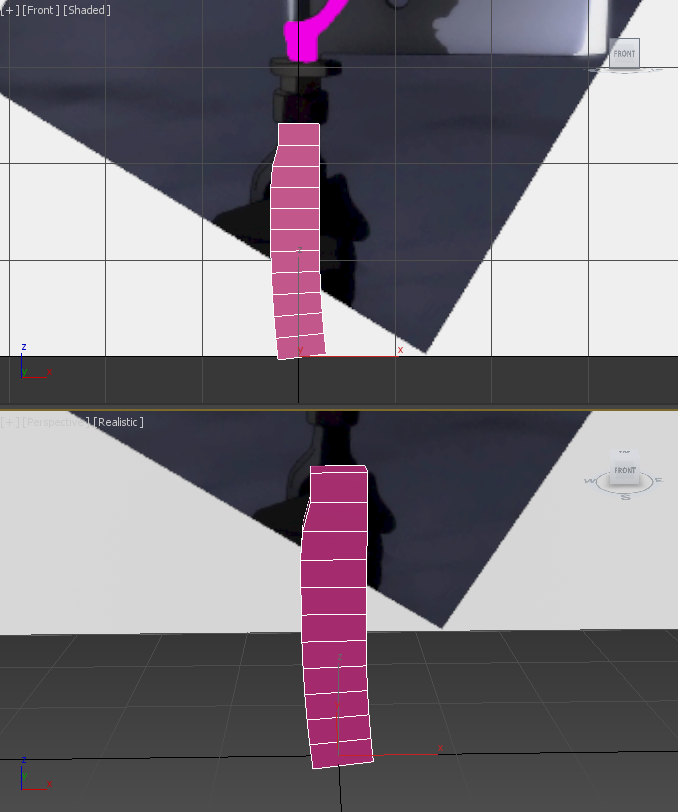
Modelling - Day 1I began my model of the Mate Chopper's handle by creating a box and used the 'Connect' tool to add many more layers of rings going vertically up the box. I grabbed all the ones on the left, except the top 2 layers and pulled them out to create a more shapely handle for the user to grip. I then applied a 'Bend' modifier to bend the bottom end of the handle. I actually used this in a limited fashion as to specify where I wanted the band to start and end, starting in the middle, and ending at the bottom. I know this is hardly anything, but on the following day I focused on getting this model done and so most of the work in on day 2.
|
|
|
Modelling - Day 2
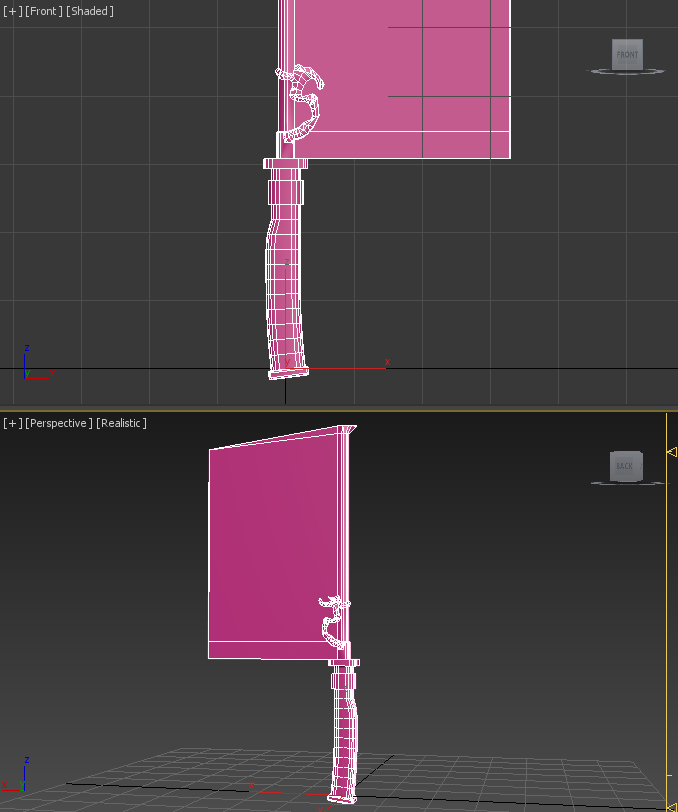
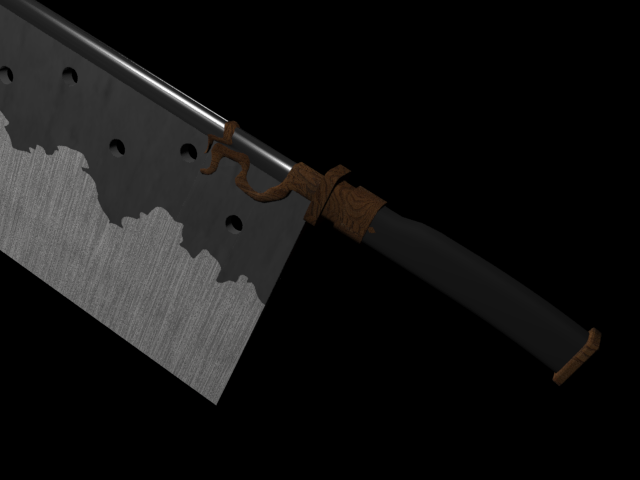
Going onward from the base handle design, I added another cube at the base, squished it down, then curved all it's edges with the 'Chamfer' tool. I then positioned this correctly and attached it to the handle before I applied the previously mentioned 'Bend' modifier. From here, I extruded upwards and outwards, to create the top where the top of the thumb and pointer finger would rest against when holding the weapon. I extruded upwards and outwards once again to create the base guard of the blade.
From here I tried to extrude once more to create the long circular pole of the blade, but going from a cube shape with rounded edges, to a full circle was tough. I spent quite some time making sure the vertices looked circular before I was happy with it. After I extruded the circular cylinder upwards, I created a diamond shape top by using the scale mode and welding some of the vertices together. Next, I flattened the one side of the circular blade base for me to extrude the blade out of using the 'Extrude' tool. After doing so, I scaled the edge vertices and welded them together to make a pointy edge to the blade.
Next was the hard part. I used the 'Cut' tool to manually draw out the shape of the wooden roots that crawled around the base of the blade. I first made the outer edges, then added a centre part, used the 'Connect' tool to connect it all together, then raised the centre line outwards using the movement mouse mode and the specific position values found at the bottom of 3DS Max when the movement mode is selected. After spending hours on this wooden roots part I finally finished the days work, with most of the model complete.
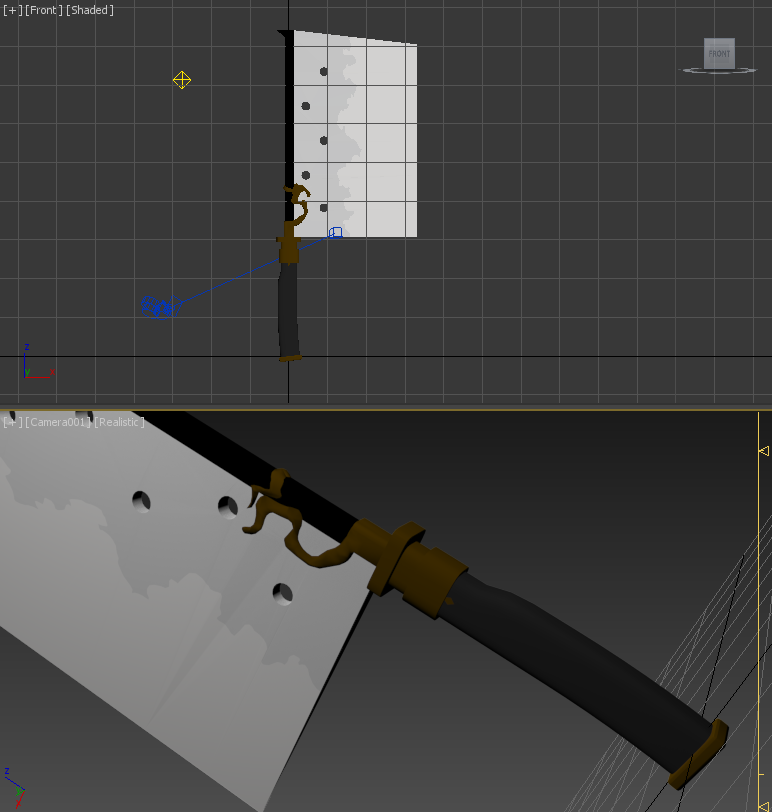
Modelling & Texturing - Day 3On day 3, all I had to do now was create the holes and texture everything. To add the holes I created cylinders in width that matched the sizes of the holes I wanted to create in the blade. I then used vertex markers to get the position of where I was putting the cylinders behind and made the base model a compound object. I then selected the cylinders and set them to subtract form the main model. This annoyingly led to a whole bunch of lines being created, but I just had to deal with them if I wanted the whole. I then finally used the 'Cut' tool to make the breaking line between the 2 textures of the blade. This took awhile as I had to do this by hand. Finally, I textured everything up by setting separate IDs for the handle, the wood, the base cylinder of the blade, the top hand of the blade and the bottom half of the blade. I used Galvanized steel for most of the metal and a wood texture I got out of the stock images within the 3DS Max folders. I then had to apply a 'UVW Map' modifier to get the textures to scale correctly for each part. Then I was finally finished.
|
|
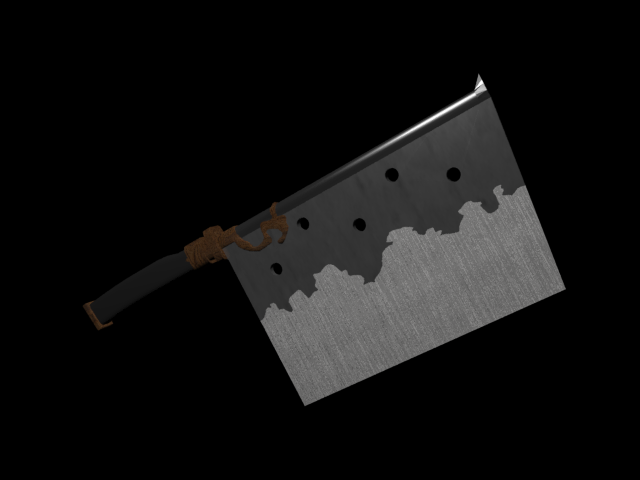
Final Images, 3D Viewer & Thoughts
I am maybe most proud of this model because of the texturing work I did for the wooden handle and the blade. I got a lot of positive remarks from peers of whom I showed this model to so I am very pleased. It was a great learning experience to figure out how UVW Maps worked too.
|
|
|